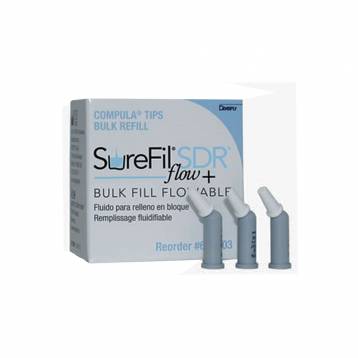
Cavity Preparation
- Prepare the cavity so that no residual amalgam or restorative material is left
- Rinse the surface with water spray and carefully dry it with air spray. Do not desiccate the tooth structure
- Use a dental dam or cotton rolls to isolate the cavity from contamination.
Placement of Matrix
For optimal proximal contacts proceed as follows:
- Place a matrix (e.g. AutoMatrix® matrix system or Palodent matrix system) and wedge. Burnishing of the matrix band will improve contact and contour. Pre-wedging/BiTine® ring placement is advocated
- In class II cavities use a deadsoft, thin matrix band.
Pulp protection, Tooth Conditioning/Dentin Pretreatment, Adhesive Application
Refer to adhesive manufacturer’s directions for pulp protection, tooth conditioning and/or adhesive application. Once the surfaces have been properly treated, they must be kept uncontaminated. Proceed immediately to placement of SDR material.
Dispensing SDR material
The pre-dosed Compula® Tip provides the combination of a unit dose Compules® Tip with a metal cannula applicator Tip
- Load Compules® Tips Gun with pre-dosed Compula Tip. Insert Compula® Tip into the notched opening of the Compules® Tips Gun barrel. Be certain that the collar on the Compula® Tip is inserted first. 5 2. Remove the colored cap from the Compula® Tip. The Compula® Tip may be rotated 360° to gain the proper angle of entrance into the cavity
- Dispense the material into the cavity preparation using a slow, steady pressure. DO NOT USE EXCESSIVE FORCE.
- To remove the used Compula Tip, be sure that the Compules Tips Gun plunger is pulled back completely by allowing the handle to open to its widest position. Apply a downward motion to the front end of the Compula Tip and remove.
Placement of SDR material
Note: As SDR™ material is designed to conform to cavity shape, proper contact areas must be established with the matrix system selected. Material will not distend matrix band. If needed, manually distend matrix band with a suitable hand instrument such as a condenser or ball burnisher prior to and/or during light curing
- Dispense SDR™ material directly into the preparation site/tooth surface from the Compula Tip using slow, steady pressure. Begin dispensing at the deepest portion of the cavity, keeping Tip close to the cavity floor. Gradually withdraw Tip as the cavity is filled. Avoid lifting the Tip out of dispensed material while dispensing to minimize air entrapment. At the completion of dispensing, wipe Tip against cavity wall while withdrawing from the operative field
- Within a few seconds, dispensed SDR material will self-level, eliminating the need for further manipulation with hand instruments. In case of overfill or excess on occlusal margins, use a flocked applicator Tip wetted with residual adhesive to remove excess. Any visible air bubbles should be pierced with a clean, sharp explorer prior to curing
- When used as a Bulk Fill Base material, most cavities may be filled in one bulk increment up to 4 mm as needed to fill the cavity 2 mm short of the occlusal cavosurface. In deeper preparations, place material in 4 mm increments, thoroughly light curing each increment
- Alternatively, SDR™ material may be placed in a thin layer as a traditional “flowable” liner on exposed dentin.
Curing SDR material is designed to be cured in increments up to a 4 mm depth/thickness
- Light cure each area of the restoration surface with a suitable visible light curing unit designed to cure materials containing camphorquinone (CQ) initiator, i.e. spectral output containing 470 nm. Minimum light output must be at least 550 mW/cm2 exposure for at least 20 seconds. Refer to curing light manufacturer’s recommendations for compatibility and curing recommendations.
Completion
- Proceed immediately to complete the restoration using a methacrylate based universal/posterior restorative material following manufacturer’s
Directions For Use.
Technique Tip: In most applications, a body shade of occlusal restorative material provides the best esthetic result. In case of heavily stained dentin, use of an opaque shade may be required. Do not disturb or allow contamination of cured surface or exposed adhesive. If contamination occurs, follow adhesive manufacturer’s directions for use for re-application of adhesive. If surfaces remain undisturbed, additional application of adhesive between increments is neither necessary nor recommended.
- If contouring, finishing, and/or polishing of cured SDR™ material is necessary, use traditional rotary devices following manufacturer’s Directions For Use.
 Our Categories


 a
a a
a a
a a
a Write a Review
 Print
Print
